How to Photograph Small Rooms in Real Estate Photography
Learn professional techniques to make small rooms look spacious and inviting. Master composition, lighting, and camera angles that maximize perceived space in property photos.

Jennifer Lee
March 14, 2026
Photographing small rooms is one of the biggest challenges in real estate photography. Cramped spaces, limited shooting angles, and the risk of making rooms look even smaller than they are can frustrate even experienced photographers. But here's the truth: with the right techniques, you can make small rooms look spacious, inviting, and desirable.
In this comprehensive guide, you'll learn professional strategies for photographing small rooms that maximize perceived space and create images buyers love.
The Challenge of Small Spaces
Small rooms present unique challenges:
- Limited space to position your camera and tripod
- Difficulty capturing the entire room in one frame
- Risk of distortion from ultra-wide lenses
- Cluttered appearance if not properly staged
- Poor lighting in compact spaces
The good news? Professional photographers use specific techniques to overcome these challenges and create stunning images of even the smallest spaces.
1. Choose the Right Lens and Focal Length
Lens choice is critical when photographing small rooms.
Optimal Focal Lengths for Small Rooms:
- 16-20mm: Best for most small rooms
- 14-16mm: For very tight spaces (use sparingly)
- 20-24mm: For detail shots and less distortion
Avoid These Mistakes:
- Too Wide (10-14mm): Creates unnatural distortion and "fisheye" effect
- Too Narrow (35mm+): Can't capture enough of the room
The sweet spot for small rooms is typically 16-18mm. This provides enough coverage without excessive distortion.
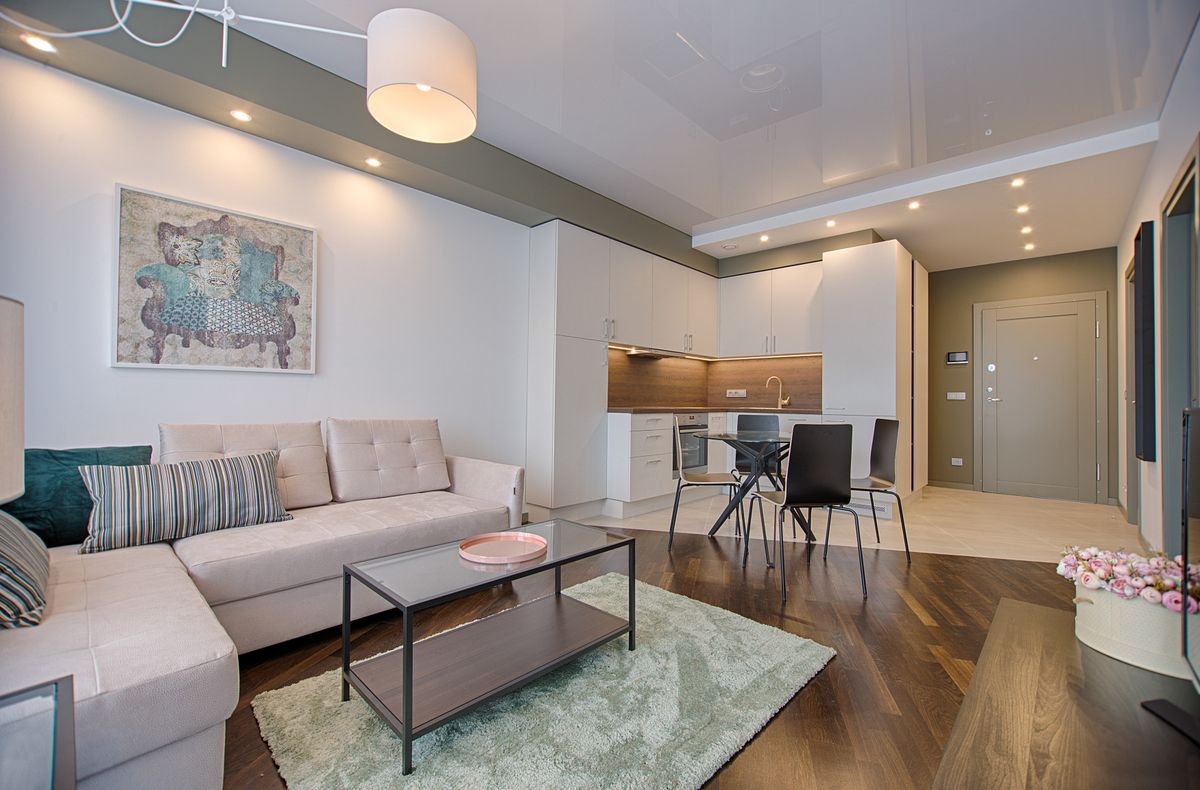
2. Shoot from the Doorway or Corner
Camera position dramatically affects how spacious a room appears.
Best Shooting Positions:
Doorway Position:
- Stand in the doorway looking into the room
- Captures maximum depth and shows room flow
- Creates natural framing with door frame
- Shows connection to adjacent spaces
Corner Position:
- Position camera in corner of the room
- Captures two walls, creating depth
- Shows more of the room's features
- Provides context and spatial relationships
Pro Tip: For very small rooms (like bathrooms), shooting from the doorway is often your only option. Make it work by ensuring the door frame is straight and using it as natural framing.
3. Keep Your Camera Level
This is even more critical in small spaces where distortion is already a concern.
Why Level Matters:
- Tilted verticals make rooms look smaller and awkward
- Converging lines create claustrophobic feeling
- Professional images always have straight vertical lines
How to Ensure Level Shots:
- Use your camera's built-in electronic level
- Enable grid display for visual reference
- Set tripod at proper height (chest level)
- Check level before every shot
- Correct any remaining tilt in post-processing
4. Maximize Natural Light
Light makes spaces feel larger and more inviting.
Lighting Strategy for Small Rooms:
- Open all curtains and blinds completely
- Turn on every light in the room
- Turn on lights in adjacent rooms visible in the shot
- Use consistent color temperature bulbs (all warm or all cool)
- Shoot during daytime for maximum natural light
- Consider adding supplemental lighting if needed
Window Management:
Windows are crucial in small rooms:
- They provide natural light that opens up the space
- Show views that extend perceived space
- Create depth and connection to outdoors
- Use HDR to balance window and interior exposure
5. Declutter and Stage Strategically
Clutter makes small rooms look even smaller. Strategic staging is essential.
Decluttering Checklist:
- Remove all unnecessary furniture
- Clear countertops and surfaces completely
- Hide personal items, photos, and memorabilia
- Remove floor clutter (shoes, bags, cords)
- Minimize decorative items to essentials only
- Store away small appliances in kitchens
- Clear bathroom counters entirely
Rule of Thumb: If it doesn't serve a clear purpose or add to the room's appeal, remove it. Less is always more in small spaces.
6. Use Vertical Space
Drawing the eye upward makes rooms feel taller and more spacious.
Techniques to Emphasize Height:
- Include ceiling in your compositions
- Capture tall elements like bookcases or curtains
- Show crown molding and ceiling details
- Photograph from slightly lower angle to emphasize height
- Include floor-to-ceiling windows or doors
7. Create Depth with Layers
Depth makes small rooms feel larger by showing spatial relationships.
Creating Depth:
- Foreground Elements: Include furniture or objects in foreground
- Middle Ground: Main room features and furniture
- Background: Windows, doorways, or far walls
- Leading Lines: Use furniture arrangement to guide eye through space
8. Show Room Flow and Connections
Showing how rooms connect makes spaces feel larger.
Connection Strategies:
- Include open doorways to adjacent rooms
- Show hallways leading to other spaces
- Capture views through multiple rooms
- Include mirrors that reflect other areas
9. Use Mirrors to Your Advantage
Mirrors can double the perceived size of a room—but they require careful handling.
Mirror Photography Tips:
- Position yourself so you're not visible in the mirror
- Use mirrors to show additional angles of the room
- Ensure mirrors are clean and streak-free
- Use mirror reflections to add depth
- Be aware of what the mirror reflects (avoid clutter)
10. Master Your Camera Settings
Proper settings ensure sharp, well-exposed images of small spaces.
Recommended Settings for Small Rooms:
- Aperture: f/8 to f/11 (maximum depth of field)
- ISO: 100-200 (use tripod for longer exposures)
- Shutter Speed: Whatever achieves proper exposure
- White Balance: 5200K or Auto (shooting RAW)
- HDR Bracketing: 3 exposures at -2, 0, +2 EV
11. Shoot Multiple Angles
Small rooms benefit from multiple perspectives to show different aspects.
Essential Angles:
- Wide Shot: Shows entire room from doorway or corner
- Opposite Corner: Provides different perspective
- Detail Shots: Highlight special features or built-ins
- Vertical Shot: Emphasizes height in very narrow rooms
12. Post-Processing Techniques
Strategic editing enhances the spacious feel of small rooms.
Editing Strategies:
- Brighten Images: Lighter images feel more spacious
- Correct Perspective: Ensure perfectly straight verticals
- Enhance Natural Light: Boost window light subtly
- Remove Distractions: Clone out minor imperfections
- Add Clarity: Enhances details without overdoing it
- Balance Colors: Warm, inviting tones work best
Room-Specific Tips
Small Bedrooms:
- Shoot from doorway to show entire room
- Include window to show natural light
- Minimize furniture to essentials (bed, nightstand)
- Make bed perfectly with minimal pillows
Small Bathrooms:
- Shoot from doorway (often only option)
- Include mirror to add depth
- Clear all countertops completely
- Close toilet lid
- Turn on all lights including vanity lights
Small Kitchens:
- Shoot from entrance to show layout
- Clear all countertops
- Open cabinet doors strategically to show storage
- Include window if present
- Show appliances and features
Common Mistakes to Avoid
- Using Ultra-Wide Lenses: Creates unnatural distortion
- Shooting Too High or Low: Distorts room proportions
- Including Too Much Furniture: Makes space feel cramped
- Poor Lighting: Dark images make rooms feel smaller
- Tilted Verticals: Makes rooms look awkward
- Visible Clutter: Distracts and reduces perceived space
The Psychology of Space
Understanding how buyers perceive space helps you photograph more effectively:
- Light = Space: Bright rooms feel larger
- Clean = Spacious: Clutter makes rooms feel cramped
- Depth = Size: Showing layers creates perceived space
- Height = Volume: Emphasizing vertical space adds dimension
Practice and Refinement
Mastering small-space photography takes practice. Start by photographing your own small spaces, experimenting with different angles, lighting, and staging. Review your images critically and identify what works and what doesn't.
Remember: the goal isn't to deceive buyers, but to present small rooms in their best light, showing their true potential and functionality.
Focus on Photography, Not Editing
You've mastered the art of photographing small spaces, capturing images that make even the tiniest rooms look inviting and spacious. But now comes the time-consuming part: editing those images to perfection.
Professional editing of small-space photos requires special attention to perspective correction, exposure balancing, and subtle enhancements that maintain realism. This detailed work can take 15-20 minutes per image.
Prixcraft specializes in editing real estate photos of all types, including challenging small spaces:
- Perfect perspective correction for straight verticals
- Expert exposure balancing and HDR merging
- Natural-looking enhancements that maintain realism
- Professional color grading and white balance
- 24-hour turnaround on standard orders
- Unlimited revisions included
- Affordable pricing starting at $1.50 per image
Let us handle the editing while you focus on capturing more properties. Upload your images today and experience professional editing that makes your small-space photos shine.
About Jennifer Lee
Specialized real estate photographer focusing on urban properties and small-space photography with 7 years of professional experience.
Ready to Transform Your Property Listings?
Get professional photo editing services that help your properties sell faster.
Start Editing with Prixcraft